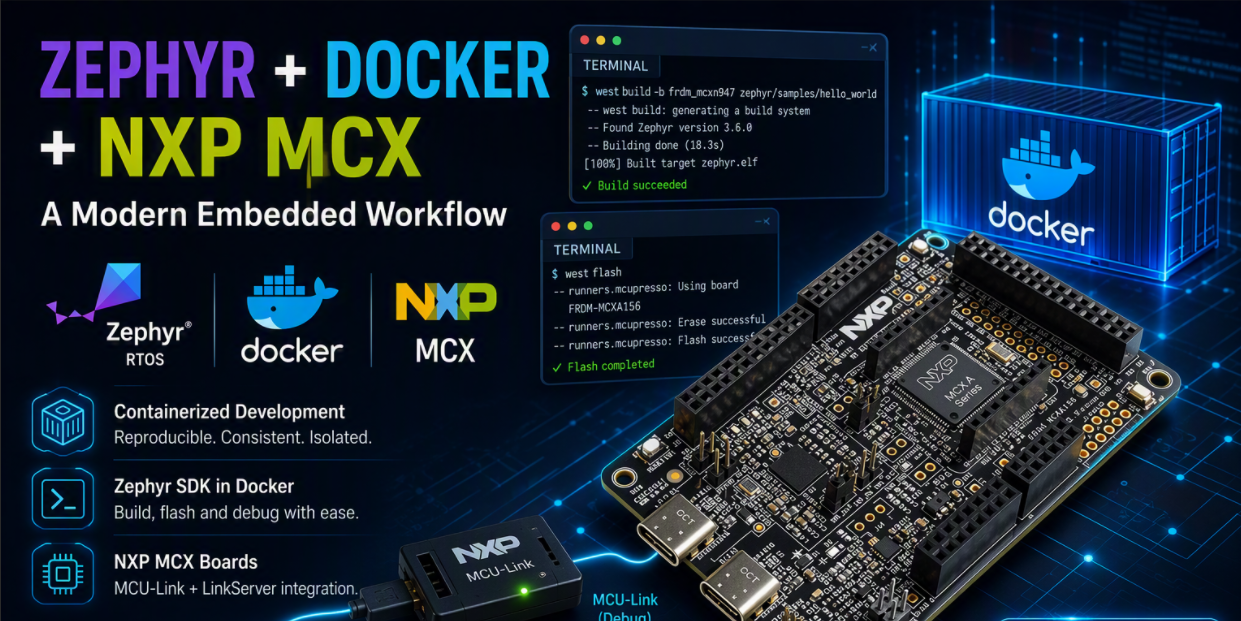
NXP is one of the founding members of the Zephyr Project, which is why its new MCX family of microcontrollers is very well supported. If you've been following the previous posts, you already know what comes next. This setup is very similar to what we did with the STM32 platform 04: Zephyr, on stm32 and OpenOCD , but this time it's tailored for MCX microcontrollers. If this is your first time using Zephyr, we recommend reading the following post before continuing.
Pull our docker container with zephyr, make a new directory, run the container and west init using our template in Github
$ docker pull modularmx/zephyros:latest
$ mkdir myProject
$ cd myProject
$ docker run -it --rm -w /home/user/workspace --mount type=bind,src="$(pwd)",dst=/home/user/workspace modularmx/zephyros:latest
$ west init -m https://github.com/ModularMX/zephyr-template.git
Modify the manifest file in app/west.yml by changing hal_nordic for hal_nxp
name-allowlist:
  # placehere all the packages you want to import
  - cmsis_6
  - hal_nxp
west update and then type west boards to list all the mcx supported boards, you can filtered using grep, for instance in my case I’m using an mcxa156
$ west update
...
$ west boards | grep "mcxa"
frdm_mcxa156
frdm_mcxa266
frdm_mcxa346
Choose the board of your preference and modify the CMakeLists.txt, in my case I’m using a frdm_mcxa156 that comes with a mcu-link and for that reason I’m going to use linkserver to flash and/or debug,
# set enviroemnt variables like the board nad the debug server
set(BOARD frdm_mcxa156)
set(BOARD_FLASH_RUNNER linkserver)
write some code in your main.c file, like the one below just for testing purposes
/* Include libraries */
#include <zephyr/kernel.h>
#include <zephyr/drivers/gpio.h>

/* Delay of 1000 ms */
#define SLEEP_TIME_MS 1000

/* Get the DeviceTree alias for the "led0" alias */
#define LED0_NODE DT_ALIAS( led0 )

/* Get pin specification (device, pin, flags) for LED0 from the Devicetree */
const struct gpio_dt_spec led0 = GPIO_DT_SPEC_GET( LED0_NODE, gpios );

int main( void )
{
    /* Configure led0 as output*/
    gpio_pin_configure_dt( &led0, GPIO_OUTPUT );

    while(1)
    {
        /* Toggle LED led0 */
        gpio_pin_toggle_dt( &led0 );
        /* Sleep for 1000ms (delay) */
        k_msleep( SLEEP_TIME_MS );
    }
    return 0;
}
build as usual to test everything is working as expected, and from here code anything you like
$ west build -p always app
...
-- Zephyr version: 4.4.0 (/home/user/workspace/deps/zephyr), build: v4.4.0
[137/137] Linking C executable zephyr/zephyr.elf
Memory region         Used Size  Region Size  %age Used
           FLASH:       35820 B         1 MB      3.42%
             RAM:        4064 B       120 KB      3.31%
        IDT_LIST:          0 GB        32 KB      0.00%
Generating files from /home/user/workspace/build/zephyr/zephyr.elf for board: frdm_mcxa156
west flash with LinkServer
Neither the our Zephyr container nor the official Zephyr Project container includes the LinkServer tool (at least as far as I know). To use it, we'll create our own Docker image based on the official Zephyr image and install the LinkServer tool on top of it. This can be done using the following Dockerfile.
# Fetch the modular image for Zephyr OS as baseline
FROM modularmx/zephyros:latest

# switch to "root" user
USER root

# which version to use:
ARG LINKSERVER_VERSION="26.6.137"
ENV PATH=$PATH:/usr/local/LinkServer_${LINKSERVER_VERSION}

# install dependencies: need to start udev manually, otherwise getting "Failed to send reload request: No such file or directory" during LinkServer installation
RUN apt-get update && apt-get install -y whiptail libusb-1.0-0-dev usbutils hwdata udev curl \
    && /lib/systemd/systemd-udevd --daemon

# install LinkServer software
RUN curl -O https://www.nxp.com/lgfiles/updates/mcuxpresso/LinkServer_${LINKSERVER_VERSION}.x86_64.deb.bin \
    && chmod a+x LinkServer_${LINKSERVER_VERSION}.x86_64.deb.bin \
    && ./LinkServer_${LINKSERVER_VERSION}.x86_64.deb.bin acceptLicense skipIdeSelect

# set sudo priviledge to user (terrible idea, i know)
RUN usermod -aG root user

# siwtchback to "user" user
USER user
Build the container with a proper name (don’t forget this has to be done outside the previous running container)
$ docker build -t west_linkserver .Connect you boards and run the container with the shared directory and access to our USB devices
$ docker run --rm -it -w /home/user/workspace --mount type=bind,src="$(pwd)",dst=/home/user/workspace --device=/dev/bus/usb:/dev/bus/usb west_linkserverTo verify everything is installed as expected just run link server to show the board is detected
root@00d9d58ecdfd:/# LinkServer probes
  #  Description                                Serial         Device    Board    Capabilities
---  -----------------------------------------  -------------  --------  -------  ----------------
  1  MCU-LINK on-board (r0E7) CMSIS-DAP V3.128  2AEECMDOSZOV3                     DEBUG, VCOM, SIO
Then just west flash and see the final result in your board
ser@37cea457467b:~/workspace$ west flash
-- west flash: rebuilding
ninja: no work to do.
-- west flash: using runner linkserver
RUNNER - gdb_port = 3333, semih port = 8888
-- runners.linkserver: LinkServer: /usr/local/LinkServer_26.6.137/LinkServer, version v26.6.137
INFO: Exact match for MCXA156:FRDM-MCXA156 found
INFO: Selected device MCXA156:FRDM-MCXA156
INFO: Selected probe #1 2AEECMDOSZOV3 (MCU-LINK on-board (r0E7) CMSIS-DAP V3.128)
INFO: MCU-Link firmware update `check`: MCU-Link firmware not found at /usr/local/LinkServer_26.6.137/MCU-LINK_installer/probe_firmware.
Debugging with VSCode
Unfortunately, the Cortex-Debug extension for VS Code does not support LinkServer, so it's not possible to debug our application directly from VS Code. Well, not exactly—there is a workaround, and it's actually my preferred approach: using two separate containers.
Let's create a dedicated container to run the NXP LinkServer, just as we did with OpenOCD in the previous post 04: Zephyr, on stm32 and OpenOCD . Create the following Dockerfile, Just make sure the version in line 9 is the latest one or the one you need
# script base on Erich Styger blog and updated by Modular team
# https://mcuoneclipse.com/2023/05/14/linkserver-for-microcontrollers/
# https://mcuoneclipse.com/2025/08/11/streamlining-linkserver-installation-for-ci-cd/

# Use a base image
FROM ubuntu:24.04

# which version to use:
ARG LINKSERVER_VERSION="26.6.137"

# set installation path to PATH variable for global execution
ENV PATH=$PATH:/usr/local/LinkServer_${LINKSERVER_VERSION}

# install dependencies: need to start udev manually, otherwise getting "Failed to send reload request:
# No such file or directory" during LinkServer installation
RUN apt-get update && apt-get install -y whiptail libusb-1.0-0-dev dfu-util usbutils hwdata udev curl sudo \
    && /lib/systemd/systemd-udevd --daemon

# install LinkServer software
RUN curl -O https://www.nxp.com/lgfiles/updates/mcuxpresso/LinkServer_${LINKSERVER_VERSION}.x86_64.deb.bin \
    && chmod a+x LinkServer_${LINKSERVER_VERSION}.x86_64.deb.bin \
    && ./LinkServer_${LINKSERVER_VERSION}.x86_64.deb.bin acceptLicense skipIdeSelect
Build the image as usual
$ docker build . -t linkserverTo verify everything is installed as expected just connect your board and run the container
$ docker run --rm -it --device=/dev/bus/usb:/dev/bus/usb linkserverTest if we can connect to our board using the following command (just Ctrl + c) to close the connection
root@00d9d58ecdfd:/# LinkServer gdbserver MCXA156
INFO: Exact match for MCXA156 found
INFO: Selected device MCXA156:
INFO: Selected probe #1 2AEECMDOSZOV3 (MCU-LINK on-board (r0E7) CMSIS-DAP V3.128)
INFO: MCU-Link firmware update `check`: MCU-Link firmware not found at /usr/local/LinkServer_26.6.137/MCU-LINK_installer/probe_firmware.
Firmware update `check`: included firmware not available - the update cannot be performed
GDB server listening on port 3333 in debug mode (core cm33)
Semihosting server listening on port 4444 (core cm33)
INFO: [stub (3333)] Ns: LinkServer RedlinkMulti Driver v26.6 (Jun 18 2026 19:45:54 - crt_emu_cm_redlink build 1308)
Ok now is time to orchestrate two containers one with the Zephyr code and SDK an the second with our Mcu-Link server, we will do this with compose just like we did o the following post using stm32. Create a new file called compose.yml in the root directory of your project.
services:
  server:      # container name
    image: linkserver:latest
    ports:          # port mapping
      - 3333:3333
    devices:        # device mapping to usb ports
      - /dev/bus/usb:/dev/bus/usb
    networks:
      static_net:         # use network static_net
        ipv4_address: 172.25.0.2  # assing ip address to container
    command: LinkServer gdbserver --keep-alive --allow-remote MCXA156:FRDM-MCXA156

  zephyr:      # container name
    image: modularmx/zephyros:latest
    working_dir: /home/user/workspace
    volumes:        # volume mapping
      - type: bind
        source: ./
        target: /home/user/workspace
    depends_on:
      - server
    networks:
      static_net:         # use network static_net
        ipv4_address: 172.25.0.3  # assing ip address to container
    command:                # keep the container running
      sleep infinity

networks:
  static_net:          # network name to be used by containers
    driver: bridge    # network driver
    ipam:
      config:         # network configuration
        - subnet: 172.25.0.0/16 # network subnet
          gateway: 172.25.0.1   # network gateway
Also create the corresponding .devcontainer.json file in the same directory
{
    // Name of the dev container
    "name": "devtools",
    // compose file to run containers
    "dockerComposeFile": "compose.yml",
    // indicate the container to run from the compose file
    "service": "zephyr",
    // indicate the working directory inside the container
    "workspaceFolder": "/home/user/workspace",
    // set bash as the default shell
    "postStartCommand": "/bin/bash",

    // set some usefull vs code configuration only exsiting in our contianer
    "customizations": {
        "vscode": {
            // Add some extensions
            "extensions": [
                "ms-vscode.cpptools",
                "trond-snekvik.gnu-mapfiles",
                "twxs.cmake",
                "marus25.cortex-debug"
            ],
            // Set a fancy themes
            "settings": {
                "workbench.colorTheme": "One Dark Pro Night Flat"
            }
        }
    }
}
In the .vscode/launch.json file just set the servertype to external and write the IP address of the LinkServer container assigned in the compose file (this last part is really important)
{
    "version": "1.12.1",
    "configurations": [
        {
            "type": "cortex-debug",
            "request": "launch",
            "name": "Debug (MCU-Link)",
            "servertype": "external",
            "gdbTarget": "172.25.0.2:3333",
            "interface": "swd",
            "cwd": "${workspaceRoot}",
            "runToEntryPoint": "main",
            "executable": "${workspaceRoot}/build/zephyr/zephyr.elf",
            "armToolchainPath": "/opt/zephyr-sdk/gnu/arm-zephyr-eabi/bin",
            "toolchainPrefix": "arm-zephyr-eabi"
        }
    ]
}
In VS Code press Ctrl + Shift + p and select Dev Containers: Reopen in Container. Now you are basically running the container in VS Code, how cool is that, and from here you can build your project, and so on. Again I’m assuming you have the docker plugin installed in your VSCode. (we already did this in 03: Zephyr with Dev containers )

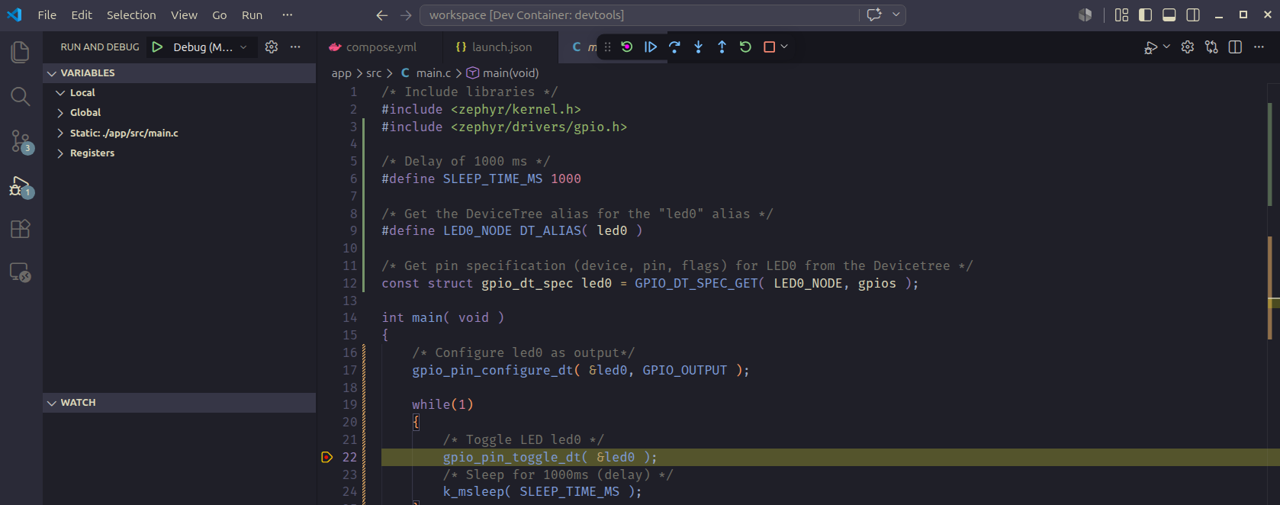
Launch a debug session as you normally would do in VSCode, and that’s it!, now you can build, flash and debug with your lovely favorite editor.
Change MCU-Link to J-Link
Just like some ST Nucleo boards the MCX boards has the possibility to update the debugger firmware with an on board j-link version that will make possible to use segger tools like Ozone and SystemView, you just need to follow the next steps
You must install the LinkServer Utility from NXP: https://nxp.com/linkserver, for Linux, Windows, or macOS. On Windows the installer runs like any other; on Linux follow the special installation steps
$ sudo ./LinkServer_26.6.137.x86_64.deb.bin acceptLicense skipIdeSelect
$ sudo cp /usr/local/MCU-LINK_installer_3.172/drivers/85-mcu-link.rules /etc/udev/rules.d/
$ sudo udevadm control --reload-rules
$ sudo udevadm trigger- Disconnect the board from the host computer, short ISP jumper (depends on your board could be the number, read the user manual) this jumper is JP5 on the FRDM-MCXA156 or the J21 in the case of FRDM-MCXN947, and reconnect the board. The MCU-Link status LED lights up and stays on.
- The previous step will set the board in ISP mode.
- Navigate to the MCU-LINK_installer_x_xxx directory, where x_xxx indicates the version number. For example, MCU-LINK_installer_3.119. Open a terminal in this directory
- Run the following command in your terminal from the MCU-LINK_installer_x_xxx directory and type the following the instruction (on linux files does not have the cmd extensions)
$ ./scripts/program_JLINK.cmd

J-Link firmware for MCU-Link programming script v1.0.8 March 2023.

NOTE: J-Link firmware supports MCU-Link Pro and MCU-Link on-board systems
that use an LPC55S69 in LQFP100 or BGA98 package.
Although the firmware can be programmed in to MCU-Link and MCU-Link on-board
systems that use LQFP64 package, the firmware will not run.

Place the board in ISP USB mode using the appropriate jumper on your MCU-Link.
Refer to the board documentation for more information.
Connect board via USB then press Space.

Press any key to continue . . .


Programming "Firmware_J-Link-MCU-Link_230502.s19"

Programmed successfully - To use: remove ISP jumper and reboot.

Connect Next Board then press Space (or CTRL-C to Quit)

Press any key to continue . . .
Once the firmware is updated, just disconnect your board and remove the ISP jumper, then type lsusb (if you are in linux) to verify that now a J-Link is detected.
$ lsusb
Bus 003 Device 002: ID 8087:0029 Intel Corp. AX200 Bluetooth
Bus 003 Device 015: ID 1366:1024 SEGGER J-Link
To go back to MCU-Link just repeat the steps but this time type the following in our terminal
$ ./scripts/program_CMSIS.cmdYour board now behaves like any other J-Link target. Create a container with the SEGGER tools (as shown in a previous post) or install the tools on your computer. Compile your application with the Zephyr container, then load the generated .elf into Ozone for debugging.
If you are new to Ozone or SystemView, the following links offer tutorials to get started.