Even thou we are talking about AUTOSAR it still important to know several features of the microcontrollers like gpio, timers, adc, interrupts and etc. It is important to know the resources and more important to know the target, in this case, will be the NXP s32k144, a 32bit microcontroller with an ARM Cortex-M4F core do not forget to download the following documentation: datasheet and reference manual.
- And PLEASE!!, read the MCAL library manual, it will help you to understand how the drivers are structured
- The following presentation will give you a nice overview about AUTOSAR layer architecture my advice is to only focus at MCAL and the CAN stack
EB Tresos
First things first, you need to get a NXP account. Got to its official website and get yourself an account . After this step we are going to get the RTD driver, got to the following link and scroll until you see the following image where you have to click

On the following page don’t pay attention to the instructions, just click on the check boxes and then Next for the following two pages

On thew Design Resources page click on Real Time Drivers link

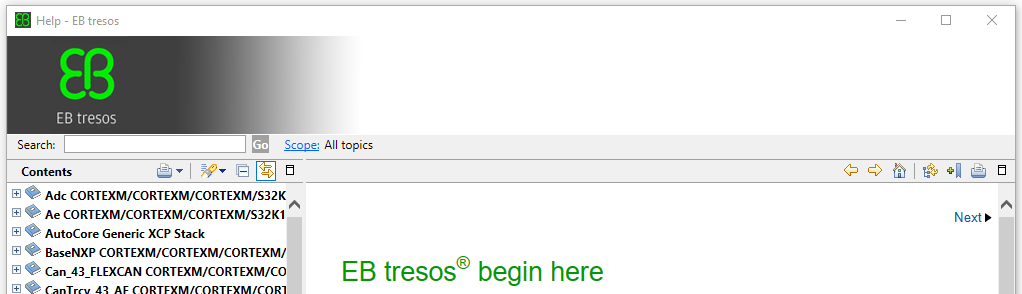
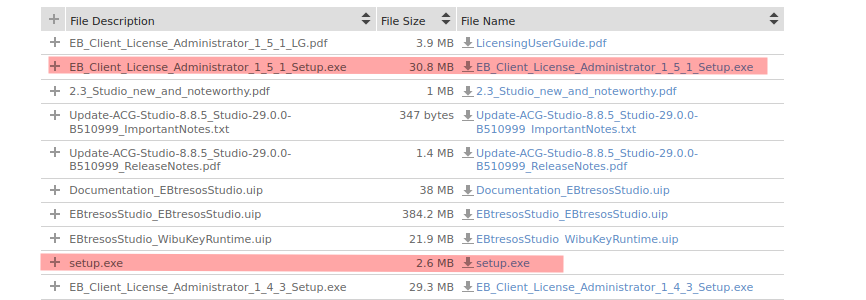
We need two things, the first one is the Tool that will allow us to configure the MCAL driver, which is called EB TRESOS made by Elecktrobit, Click on its own link, then choose version 29, click on Agree button. And install the following two things. The second one is the actual Tresos tool.
- Download the EBTresosStudio_EBTresosStudio.uip and change the extension from zip to uip
- Download the setup.exe and run the installation
- Download the License administration and install
After installing the EB Tresos studio open the Clint License administrator and input the License Key provided in the same page.
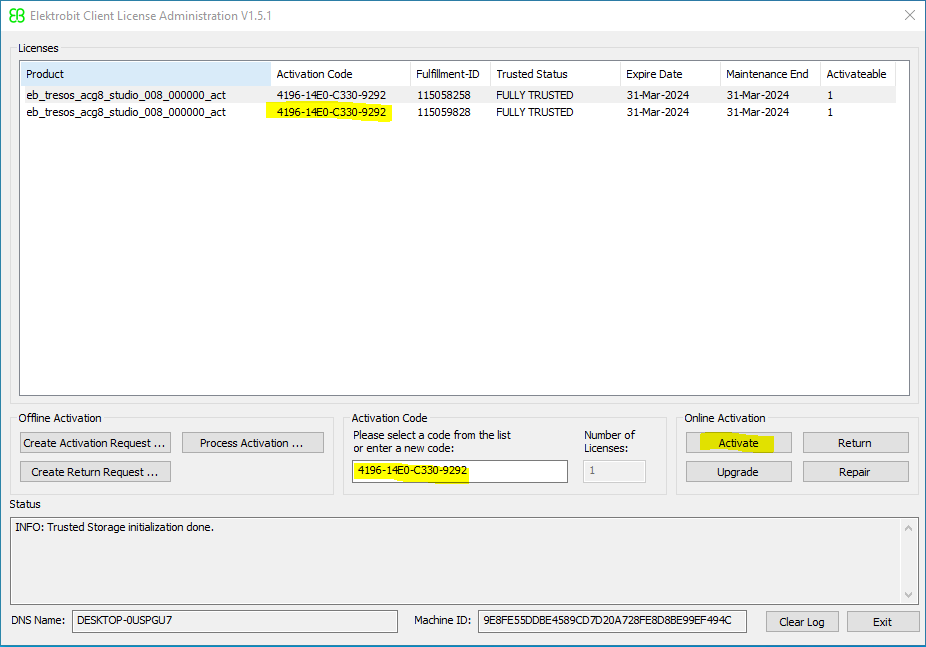
(by the moment your are reading this it is probably the number has change, so don use the one your seeing in here)

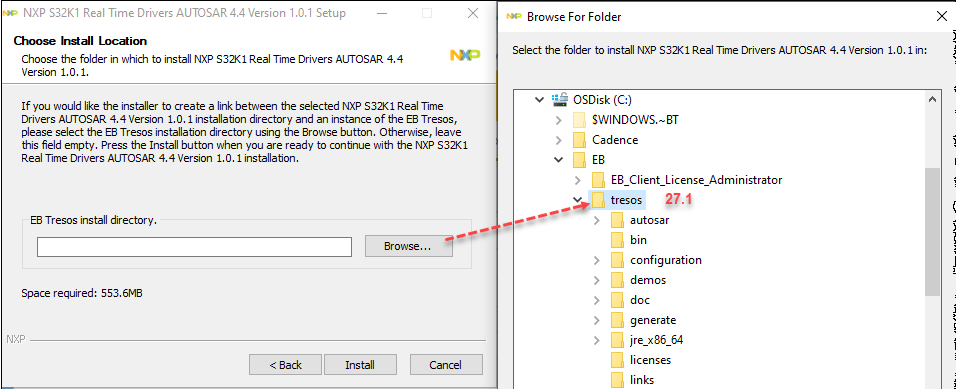
Go back to Product information page, and this time go for the Real-Time Drivers.
Download and install the latest version and when you run the installation do not forget to point it out the EB Tresos install path (This is very important!!!)
Compiler
We need a new compiler and even though we can use a generic one we would like to chose the NXP official flavor, and this can be downloaded from here, scroll down until you found the GCC compiler. WE DO NOT NEED the S32 Studio!!!, just the compiler, so download and install as usual in windows.

Switching OpenSDA for Jlink
- Download the file OpenSDA_V1.bin
- Put the S32K Board into Bootloader: Mode:
- Set jumper J104 to position 1-2.
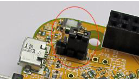
- Hold RESET button SW5 on the board down and connect a USB cable to J7
- When you hear the USB dual-tone, release the RESET button to enter bootloader mode.
- The S32K board will act as a USB mass storage device called BOOTLOADER connected to your PC. Open this
USB device with Windows Explorer. - Copy and paste or drag and drop OpenSDA_V1.bin into this Bootloader USB device.
- Exit Bootloader Mode:
- Set jumper J104 to back to position 2-3.
- Cycle the power to the S32K board while holding RESET button down once more. Then release the button
- The S32K board is now ready to connect to SEGGER Ozone
Debugger
The Bolter Board comes with a pre programmed SEGGER Jlink to help us to flash and debug our microcontroller, and of course we need some drivers to make it work with windows, got to segger official page and dowload the J-Link Software and Documentation Pack

Once installed we can use the same VS Code with some sort of plugin to debug our program in a graphical way, or a more powerfull option with SEGGER , you can found the link in the same page

The Template
Start from scratch is… well honestly can be though for a newbie, that is why you should download our template project , which already comes with a Tresos project plus a makefile to compile the most simple example to run in your board. Using Git clone it from here,
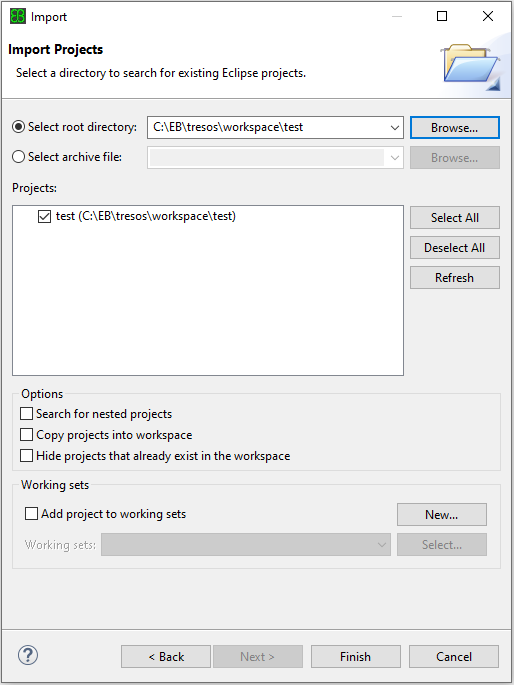
after that, open with Tresos Importing the project in the following way:
- File → Import…
- Select General → Existing Projects into Workspace
- then Next and Browse… the project folder ( the cloned repo ) and Finish
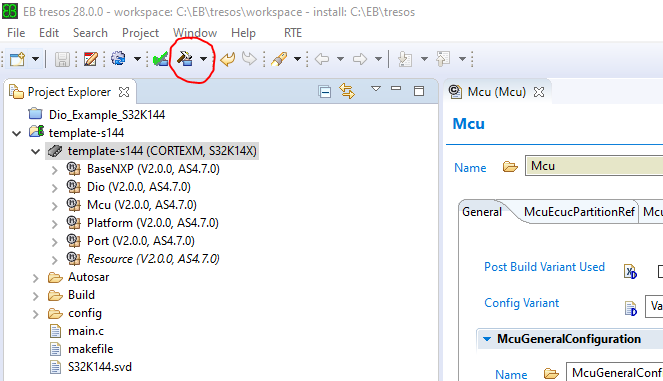
Select the project and double click in template-s144 → test (CORTEX, S32K14X) to display all the modules in use, then just click in icon Generate code for the current selected projects, it's the hammer
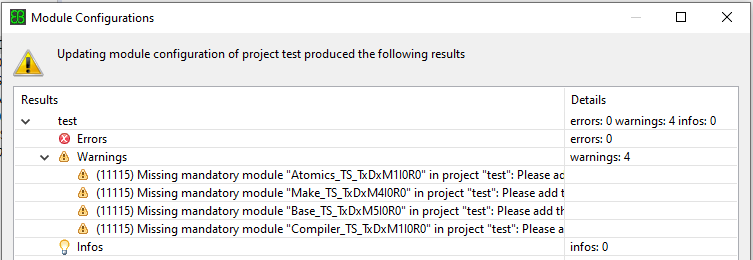
By the way do not pay attention to the warning dialog down below, it tells you some module are missing but those are not required due the license we are using
Flashing the device
Open the folder project with VS Code, open its terminal and type make ( make sure the shell is bash and not powershell please )
modular@DESKTOP-0USPGU7 MINGW64 /c/EB/tresos/workspace/template-s1 (master)
$ make
...
...
/c/NXP/gcc-10.2-arm32-eabi/bin/arm-none-eabi-objcopy -Oihex Build/temp.elf Build/temp.hex
/c/NXP/gcc-10.2-arm32-eabi/bin/arm-none-eabi-objdump -S Build/temp.elf > Build/temp.lst
/c/NXP/gcc-10.2-arm32-eabi/bin/arm-none-eabi-size --format=berkeley Build/temp.elf
text data bss dec hex filename
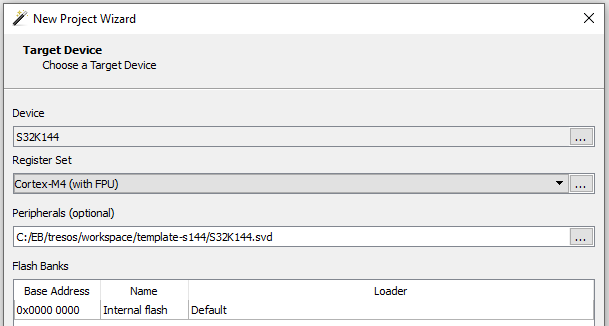
31384 40 2464 33888 8460 Build/temp.elfTo flash the the binaries into the microcontroller you need to use Ozone. After opening the program set Device to S32K144, well, just like the image below and then Next two times
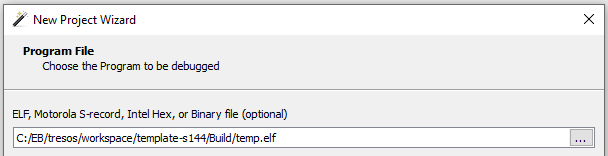
Select the elf final generated after the Build process and Next again, and then Finish ( oh God!!, how much i hate the GUIs )
Click in the green icon to download the binary into the Microcontroller ( just ignore and accept the pop up windows ) and then play around with the debugger controllers, click in Resume program execution icon to see your happy blinky led in action.

Ozone debugger is not different from other debugger, pretty much all of them are the same, take a look at its user manual to see all the functions you can use, or if you prefer you can setup VS Code to be your defacto debugger ( not as powerful as Ozone in my opinion )
Before step in into the the next parts take a look at the following pages