You don’t need a physical board to start working with Zephyr—you can use its simulator. Nowadays, there's a growing trend toward working with virtual targets, and Zephyr is no exception. Although simulators have their limitations, they allow you to begin development long before your hardware arrives. Let me show you how
#include <zephyr/kernel.h>
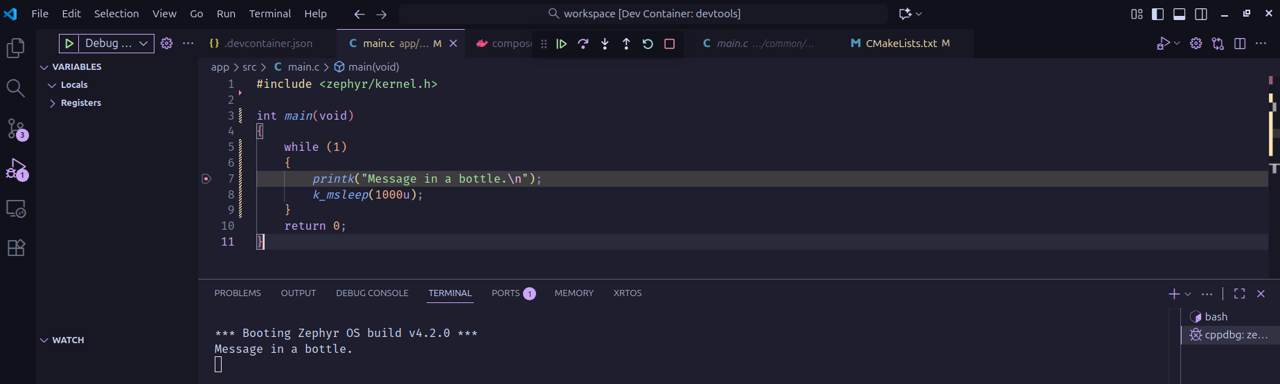
int main(void)
{
while (1)
{
printk("Message in a bottle.\n");
k_msleep(1000u);
}
return 0;
}We can run the previous code on our computer—it just needs to be compiled for the native_sim board. To do this, update the CMakeLists.txt file accordingly. After that, simply run west build app (assuming you're using our template).
# Minimum CMake required version
cmake_minimum_required( VERSION 3.20.0 )

# set enviroment variables like the board in use
set(BOARD native_sim)

# Get Zephyr directory
find_package(Zephyr REQUIRED HINTS $ENV{ZEPHYR_BASE})

# Project name and source files
project(Sim)
target_sources(app PRIVATE src/main.c)
An executable is generated inside the build/zephyr directory. You can run it from the project’s root folder like this: (To stop the execution, just press Ctrl + C.)
$ ./build/zephyr/zephyr.exe
*** Booting Zephyr OS build v4.2.0 ***
Message in a bottle.
Message in a bottle.
Message in a bottle.
Message in a bottle.
^C
Stopped at 4.030s
You can also debug your program using GDB directly in your terminal. If you're using our container, the debugger is already installed. From there, you can enter commands and set breakpoints as needed. It’s a good idea to learn the basics of GDB:
$ gdb build/zephyr/zephyr.exe
GNU gdb (Ubuntu 15.0.50.20240403-0ubuntu1) 15.0.50.20240403-git
Copyright (C) 2024 Free Software Foundation, Inc.
...

Reading symbols from build/zephyr/zephyr.exe...
(gdb)
(gdb) list
1       #include <zephyr/kernel.h>
2
3       int main(void)
4       {
5           while (1)
6           {
7               printk("Message in a bottle.\n");
8               k_msleep(1000u);
9           }
10          return 0;
Of course, you can also use VS Code to debug your program. Just use the following launch.json configuration. This setup is simpler than previous configurations because this time, we’re debugging a program running directly on our computer (in our case, inside the container).
{
    "version": "1.12.1",
    "configurations": [
        {
            "type": "cppdbg",
            "request": "launch",
            "name": "Debug (PC)",
            "cwd": "${workspaceRoot}",
            "stopAtEntry": true,
            "program": "${workspaceRoot}/build/zephyr/zephyr.exe"
        }
    ]
}
Launch a debug session as usual, and have fun!!

There’s more you can do than just using printf. Some peripherals can be simulated quite well, while others have limitations—and of course, some are nearly impossible to simulate. You can check the official Zephyr documentation to see what can be simulated and understand the corresponding limitations
You can find a Device Tree source file defined for the native_sim board, with some interesting peripherals already configured (which you can, of course, expand using an overlay). It's located at: zephyr/boards/native/native_sim/native_sim.dts In this file, you’ll find, for example, a GPIO port and even a predefined LED instance.
/ {
	model = "Native Sim Board";
	compatible = "zephyr,posix";
    ...

    leds {
		compatible = "gpio-leds";
		led0: led_0 {
			gpios = <&gpio0 0 GPIO_ACTIVE_HIGH>;
			label = "Green LED";
		};
	};
    ...

    gpio0: gpio_emul {
		status = "okay";
		compatible = "zephyr,gpio-emul";
		rising-edge;
		falling-edge;
		high-level;
		low-level;
		gpio-controller;
		#gpio-cells = <2>;
	};
GPIO Emulation
Let’s see how we can use GPIO emulation. Write the code below, where you'll notice some emul_ functions—these are used to get the pin status and display it using printk. Without these, we wouldn’t see anything happen, since there’s no actual LED connected.
In this case, the GPIO emulation is mainly intended for testing purposes with ztest, and its functionality is somewhat limited.
#include <zephyr/kernel.h>
#include <zephyr/drivers/gpio.h>
#include <zephyr/drivers/gpio/gpio_emul.h>

static const struct gpio_dt_spec led = GPIO_DT_SPEC_GET(DT_ALIAS(led0), gpios);
int get_led_output( const struct gpio_dt_spec *led );

int main(void)
{
    int led_val;
    gpio_pin_configure_dt(&led, GPIO_OUTPUT_ACTIVE);

    while (1)
    {
        gpio_pin_toggle_dt(&led);
        /*get the current status of the pin connected to our virtual led*/
        led_val = get_led_output(&led);
        printk(" Led status [ %d ]  \n", led_val);
        k_msleep(1000u);
    }
    return 0;
}

int get_led_output( const struct gpio_dt_spec *led )
{
    /*ge the emulated device from the led0 node, wich is basically gpio0*/
    const struct device *dev = device_get_binding(led->port->name);
    return gpio_emul_output_get(dev, 0);
}
In your conf file enable the gpio emulation library
CONFIG_GPIO=y
CONFIG_GPIO_EMUL=y
You may have noticed in the previous code that we used a function called gpio_emul_output_get to read the value of the output pin we were modifying. This function is part of the GPIO emulator API
Among other things, this API allows you to simulate input values, which can be useful for testing. Its main purpose is to help you validate your code using ztest.
$ ./build/zephyr/zephyr.exe
*** Booting Zephyr OS build v4.2.0 ***
 Led status [ 0 ]
 Led status [ 1 ]
 Led status [ 0 ]
 Led status [ 1 ]
 Led status [ 0 ]
 Led status [ 1 ]
 Led status [ 0 ]
^C
Serial port simulation
But faking peripherals isn’t the only thing we can do. In certain cases, we can simulate their behavior quite accurately—like with the serial port. Take the following code as an example:
#include <zephyr/kernel.h>
#include <zephyr/drivers/uart.h>
#include <string.h>

/* Get the device tree name for the uart port using an alias,
as it is defined in the device tree file*/
const struct device *uart_dev = DEVICE_DT_GET( DT_NODELABEL( uart0 ) );

/* Set an array with the message */
const char msg[] = "Hello from UART\n\r";

int main( void )
{
    while(1)
    {
        /* Send characters one by one with uart_poll_out() */
        for( uint8_t i = 0; i < strlen( msg ); i++)
        {
            uart_poll_out( uart_dev, msg[i] );
        }
        /* Just to keep our main thread */
        k_msleep( 1000 );
    }

    return 0;
}
In your conf file enable the following options
CONFIG_SERIAL=y
CONFIG_EMUL=y
Once you build your programs an run the executable, you will notice a message telling you the simulated serial port is now connected to an emulated port /dev/ptr/1
$ ./build/zephyr/zephyr.exe
uart connected to pseudotty: /dev/pts/1
We need to install minicom (a terminal emulator) in our container. If you’re not using the container, you can skip this step and use any other serial emulator you already have.
$ sudo apt-get update && sudo apt-get install -y minicomRun minicom with a connection to /dev/pts/1 , notice we do not indicate baudrate, because is an emulation
$ minicom -D /dev/pts/1

Welcome to minicom 2.9

OPTIONS: I18n
Port /dev/pts/1, 18:38:50

Press CTRL-A Z for help on special keys

Hello from UART
Hello from UART
Hello from UART
Hello from UART
By the way you can take a look at file zephyr/boards/native/native_sim/ to locate the uart available and take a look at its emul api
/ {
	model = "Native Sim Board";
	compatible = "zephyr,posix";
    ...

	uart0: uart {
		status = "okay";
		compatible = "zephyr,native-pty-uart";
		/* Dummy current-speed entry to comply with serial
		 * DTS binding
		 */
		current-speed = <0>;
	};

	uart1: uart_1 {
		status = "disabled";
		compatible = "zephyr,native-pty-uart";
		/* Dummy current-speed entry to comply with serial
		 * DTS binding
		 */
		current-speed = <0>;
	};
We could spend more time giving examples on how to use the emulated peripherals, but it might be better to create dedicated examples for some of them. Some peripherals are particularly interesting—for instance, CAN can be used with Linux SocketCAN to achieve a very realistic simulation. Another great example is display emulation: combined with the LVGL library, you can develop your HMI entirely without hardware.